How To Make Lotion Bars

MAMA, CAN I EAT THIS?
I’m not sure when my kids first mistook my homemade lotion for a jar of mayo in the fridge, but in this house they know to check before they chew. Sure, the point of making my own personal care products is that they’re safe enough to eat, but so far no one in this house actually wants to. And yeah, someone needs a labeler for Christmas.
So when my son asked yesterday if he could eat these, I just laughed. Sure, they look like homemade white chocolate, but they’re actually my secret for all-over skin nourishment.
These homemade lotion bars melt slightly when rubbed against the warmth of your skin, leaving a layer of moisture that softens and protects. They’re perfect both in the dry winter months and as a summertime after-sun soother. Many people find them especially helpful for dry patches on elbows, knees, feet and hands.
Need another reason to love them? I’ll give you two. They’re relatively inexpensive to make and they make a thoughtful gift for teachers, friends and family. I keep one in my purse, another one in a soap dish next to the kitchen sink for after I wash dishes, and a few in my pantry to give away.
ABOUT THE INGREDIENTS
Luxurious and silky smooth, this particular blend of cocoa butter, coconut oil and beeswax is one of my favorite lotion bar recipes. You’ll love the way it feels, and you’ll feel good about knowing what you’re putting on your skin, too! Here’s a breakdown of the ingredients:
Coconut Oil
As I mention here, extra virgin coconut oil happens to be very rich in antioxidants that prevent free radical formation. Free radicals cause skin to lose elasticity among other things, so obviously we don’t want them showing up in our skincare. Coconut oil is antibacterial and antifungal as well, which is beneficial for maintaining clear skin. And because its molecular structure is relatively small, these benefits penetrate deep into underlying tissues that most moisturizers can’t reach. Of course, it smells really good too.
Though expeller-pressed coconut oil is not as rich in antioxidants, I still use it often in personal care products because it’s more affordable. It does all the same things as extra virgin coconut oil – just to a lesser degree – and is very effective at helping skin retain moisture.
Cocoa Butter
Cocoa butter is rich in Vitamin E and fatty acids, and according to this study it improves skin tone and elasticity. It is often used to soothe dry skin, rashes, eczema, scars, stretch marks, and psoriasis. Because non-organic cocoa butter is often extracted using harsh solvents like hexane, I recommend using only organic sources like this one.
Beeswax
Beeswax adds a protective barrier to skin that locks in moisture and helps keep the bar firm. I prefer organic versions because chemicals and pesticides sometimes used in conventional beekeeping may collect in the wax.
Vitamin E (Optional)
This anti-oxidant is thought to smooth skin and reduce wrinkles. From a more practical standpoint, it extends the shelf life of lotion bars by preventing oils and butters from becoming rancid prematurely. This is my preferred form of vitamin E because it contains naturally derived mixed-tocopherols rather than an isolated form of vitamin E, and it doesn’t contain soy oil. I don’t know that I would buy it just for use in beauty products, but I keep it on hand as a supplement so it’s what I use for both.
Essential Oil (Optional)
This lotion bar has a natural white chocolate scent thanks to the cocoa butter. However, if you’d like to add additional scents I suggest peppermint (for white chocolate peppermint), sweet orange and vanilla* (for yummy creamsicle), or an essential oil with therapeutic properties you’re specifically looking for, such as cedarwood atlas for eczema.
*For this purpose I recommend vanilla that is blended in jojoba oil, not the absolute version.

LOTION BAR RECIPE
This recipe makes eight of the 1.5 fluid ounce square lotion bars pictured.
Ingredients (By Weight)
- 4 ounces coconut oil (where to buy coconut oil)
- 6 ounces cocoa butter (where to buy cocoa butter)
- 4 ounces beeswax (where to buy organic beeswax)
- up to 1½ teaspoons essential oil (optional)
- 1⁄2 teaspoon Vitamin E (optional, I use this one both as a supplement and in my skincare products)
If no scale is available, try:
- 1⁄2 cup melted coconut oil (where to buy coconut oil)
- 2½ cups grated cocoa butter, loosely packed(where to buy cocoa butter)
- ½ cup grated beeswax, tightly packed (where to buy organic beeswax)
- up to 1½ teaspoons essential oil (optional)
- 1⁄2 teaspoon Vitamin E essential oil (optional, I use this one both as a supplement and in my skincare products)
Special Equipment
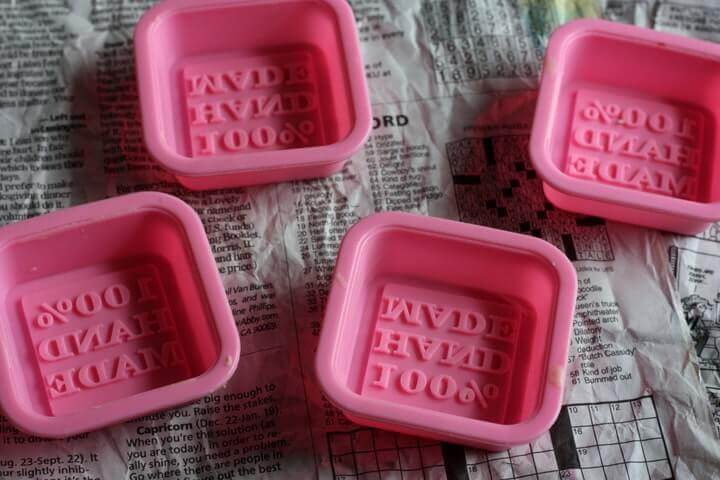
Silicone mold, muffin tin or other mold (I used this square soap mold that says “100% Handmade”)
How To Make Lotion Bars
Fill a medium pot with about two inches of water and bring to a boil. Place a smaller pot or heat-proof stainless steel bowl inside the larger pot to create a double boiler. Add coconut oil, beeswax and cocoa butter to the bowl/pot. Stir occasionally until it is fully melted, then remove from heat. If you are adding essential oils or vitamin E, allow the mixture to cool a little before mixing them in and pouring the liquid in to your molds. If you are not adding essential oils or vitamin E, pour the liquid directly into your molds. Allow lotion bars to cool fully before unmolding them. If you want to speed things up, pop them into the fridge or freezer for ten to twenty minutes.
How To Use Lotion Bars
Rub lotion bars between your hands or on the desired area (elbows, feet, knees, etc.), then massage into skin as needed.
Shelf Life
Because there is no water in this formula, it is shelf stable for up to a year without the use of preservatives. Store out of direct sunlight and away from heat – it will melt!
FREE Ebook: DIY Body Care Gifts Made Simple
Do you want to write “Made with love” on gorgeous, handcrafted gifts for family and friends, without spending a bunch of time on them because your life is already full?
Then I’d love to give you a free copy of DIY Body Care Gifts Made Simple – my step-by-step guide to making gorgeous handcrafted gifts without stressing yourself out – as a gift for signing up for my newsletter. I’ll show you how to make vintage labels, luxurious lotion bars, lip balms, sugar scrubs, body sprays and more like a pro. Don’t miss out!
Aucun commentaire