The Happiness Jar – Transform the Next Year One Moment at a Time

“Enjoy the little things, for one day you will look back and realize they were the big things.”
~ Robert Brault
These days, people try to sell us everything from miracles in a tube to Hope in a Jar. So when the term happiness jar started rolling around social media circles, you might have thought “Who’s selling something now?”
The answer: No one. This is the real deal, and that’s because it can’t be sold. This treasure can only be handcrafted by you, FOR YOU. It’s Happiness In A Jar, which was first introduced by Elizabeth Gilbert.
Basically, here’s the idea: Every day you add a note to your jar that describes a moment that made you happy, preferably with pretty scrap paper. The more you fill it up with happy and thankful moments, the more beautiful it becomes. Isn’t that just the perfect picture of what life is like?
WHY I DECIDED THIS IS THE YEAR
For me, the decision to make this my Happiness Jar Year came when I was standing at a parade wishing I’d washed my hair. You see, the year before I’d stood at the same parade, held the very same baby boy, and wished the same thing about my hair. While it may seem on the surface that nothing had changed in those 365 days, the truth is that SO MUCH had. My baby boy went from a wee babe to a walking, talking boy in a thousand almost imperceptible steps.

He and his siblings have brought more laughter and joy than I could have imagined before becoming a parent. (And also a fair amount of frustration, but we’re focusing on the good stuff for now.)
I know theoretically that they will not always be this small, and that the daily joys they bring will someday be forgotten unless I write them down. Honestly, though, it’s a reality I find difficult to grasp. It’s so easy to take the little joys of this phase for granted, but as a gift to the future me I’m trying to be more intentional about savoring (and documenting) this time. That’s why I decided to make this my year.
I’d love it if you’d join me on this journey, so I wanted to share with you some of the questions I had, as well as the answers I found:
WHAT SHOULD I ADD TO MY HAPPINESS JAR?
This is YOUR jar, so you make the rules. There are lots of things you could include depending on what seems most fitting that day:
- Your happiest moment that day
- Something you are grateful for
- As suggested here, you could also include “a lucky token, ticket stub from a trip you loved or a note from a loved one.”
- Notes from your kids about their happiest moments
Whatever it is, write it down, put a date on it, and toss it on the jar.
MAKING IT PRACTICAL
As a busy mama of three, I don’t typically look for MORE things to add into my routine. But because I know I’ll treasure these little scraps of paper when the potami are older, I’ve devised a way to make it practical. Here’s my plan:
As I go throughout my day, I’m going to use my phone to email myself about moments that were particularly meaningful to me: something funny one of the potami said, writing a note to Daddypotamus and folding it into a football like I did in third grade, receiving a message from a mama who found my post on tongue ties and finally figured out the root of her nursing issues, etc.
At dinnertime, I might ask the potami about some of their best moments from the day and include those, too. Then after they go to bed, I’ll jot down our happiness moments and toss them into the jar.
WHEN DO I OPEN MY HAPPINESS JAR?
Some people like to open it on New Years, while others prefer to pop it open whenever life gets tough.

HOW TO MAKE A HAPPINESS JAR
Technically, all you need is a jar, a pen, and some paper. But if you’re like me, you may have seen these apothecary jars from Wisteria (which are listed for sale here) and thought two things:
What do you mean they’re out of stock!?!?!
$49!?!?! I’ll bet I can make something similar and still have enough left over to buy a jar of coconut oil.
If that’s you, read on. I was able to make two similar jars for less than $20 each, and that’s even with leftover paint for other projects, and some lovely new stencils that I know I’ll use again. One says happiness and gratitude, and the other says dreams.
Supplies Needed
I picked up everything I needed at a local craft store, but if you can’t find things locally I’ve also linked to where they can be found online.
- Jar (I used one this one)
- Water-based, non-toxic glass paint in a frost finish (like this)
- Stencils (I picked these up at my local craft store)
- Inexpensive stipple brush (I bought mine along with several other tools for $1.99 at my local craft store, but you can also find them online)
- Parchment paper, tracing paper (you could also use vellum if you have it on hand)
- Pencil
- Alcohol of any kind (rubbing, vodka, etc.) to clean the glass prior to application
- Cotton ball or soft, lint-free cloth
- Hair dryer (optional)
- Paper for writing down your memories. I used scrapbooking paper – one sheet will make sixteen 3 in. x 3 in. squares.
Gratitude/Happiness Jar Tutorial
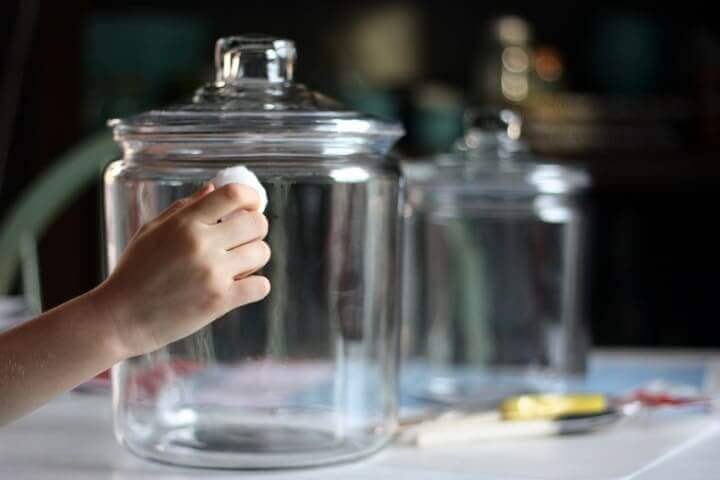
Step 1: Dip your cotton ball/cloth in alcohol and wipe down the surface of the glass.
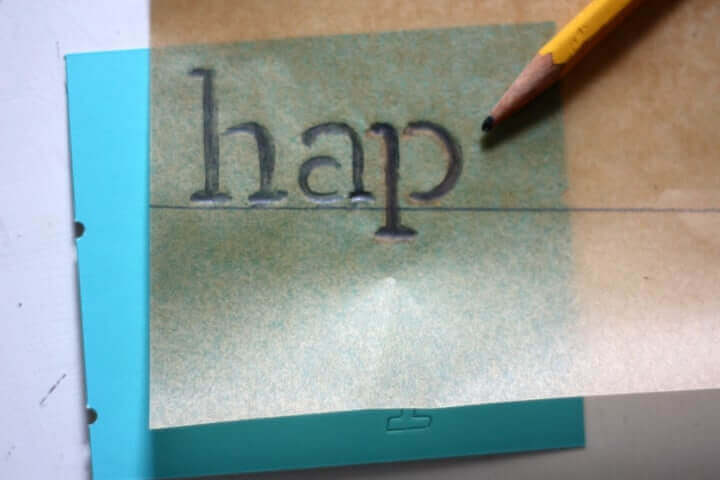
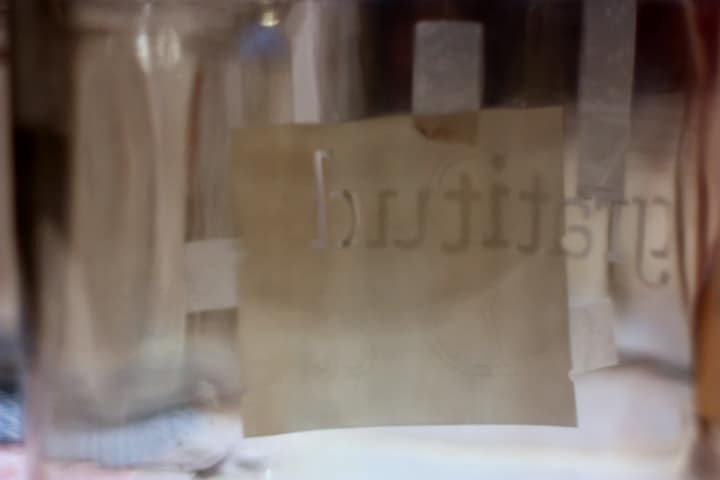
Step 2: Using a ruler, draw a long line on your parchment paper/tracing paper. Lay the stencil underneath the parchment paper and position it over the line. Using your pencil, fill in the letter depicted by the stencil.
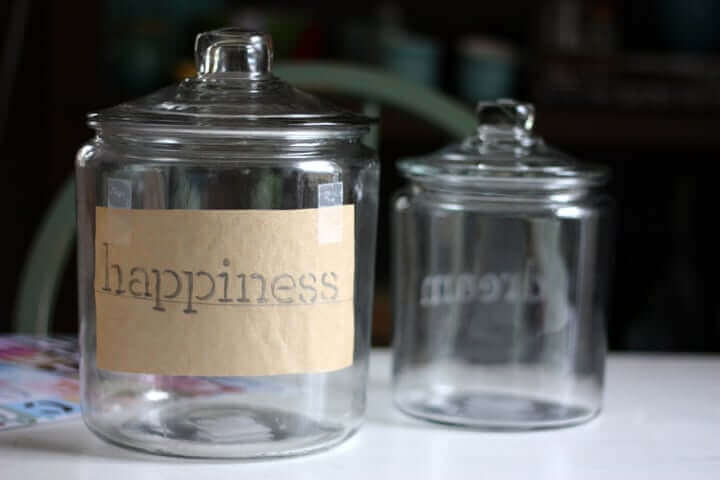
Step 3: Once you have the entire word traced onto your paper, tape it to your jar.
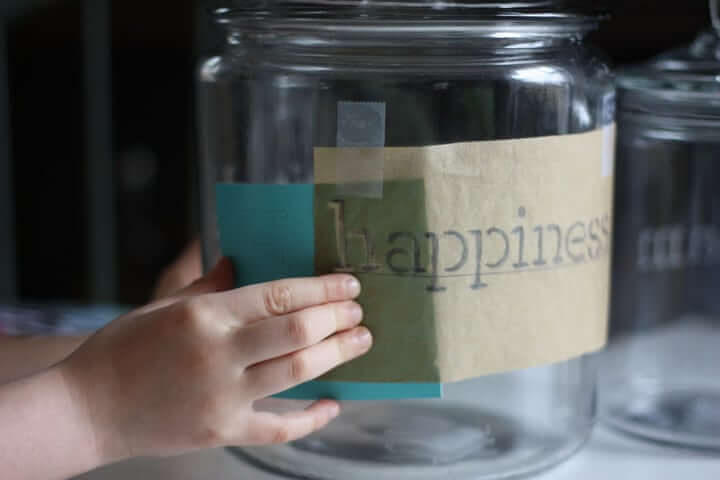
Step 4: Slide the “h” stencil (or whatever letter you’re using) under the parchment paper. Match the stencil “h” with the traced ‘h,’ then tape the stencil into place.
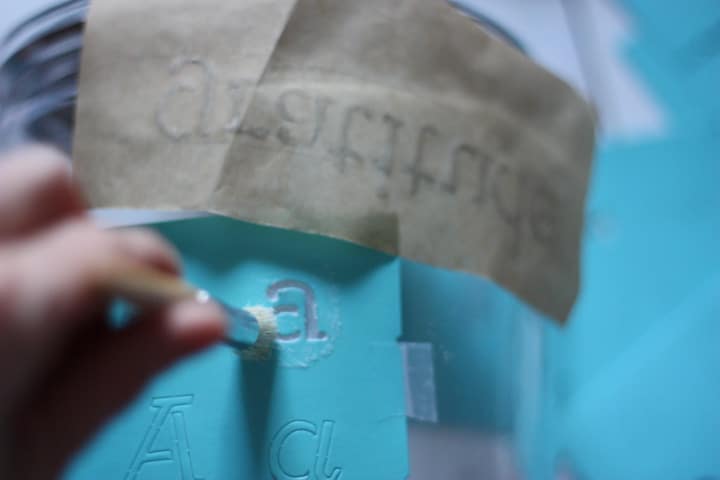
Step 5: Using your stippling brush, apply a thin layer of paint to the stencil. Rather than long strokes, just dab the paint on in a “pecking” motion. This creates the texture that makes it look sandblasted.
Wait for it to dry (or use a hairdryer on it for 30 seconds if you’re impatient like me), then apply a second layer. Dry again, then apply one last layer if needed. Complete the rest of the letters and you’re done!
Tip: If at any point you find it hard to get a stencil lined up properly, you can turn the jar around to get a different perspective.
Step 6: Start writing down what makes you happy!

Aucun commentaire